


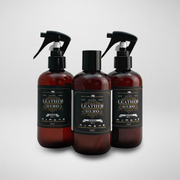
Leather Repair & Recolour Kit - Midnight
A pro-grade repair and refinishing system for pigmented (painted/coated) leathers.
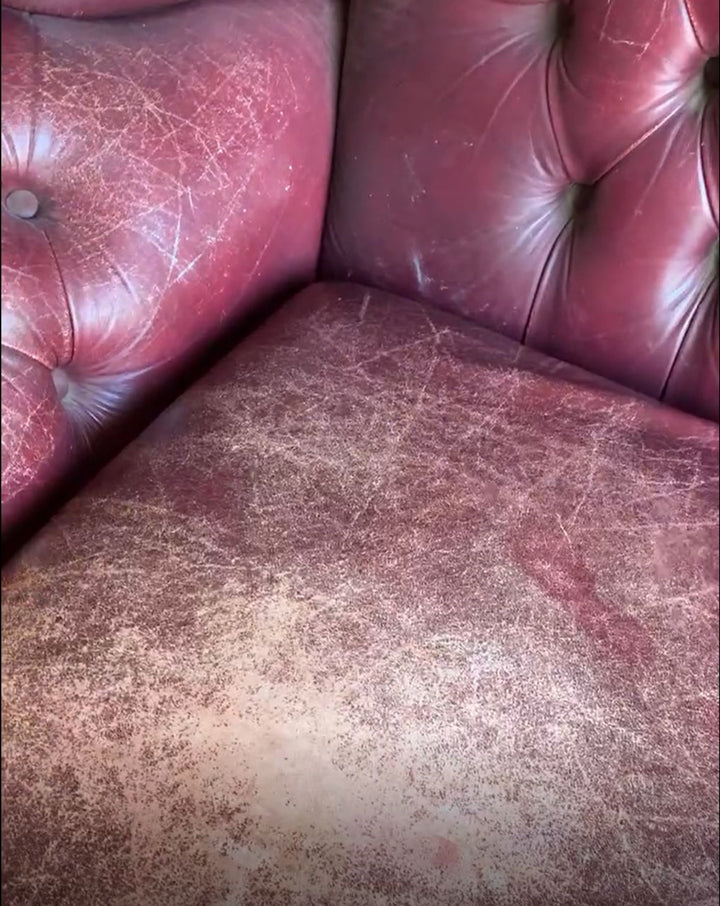
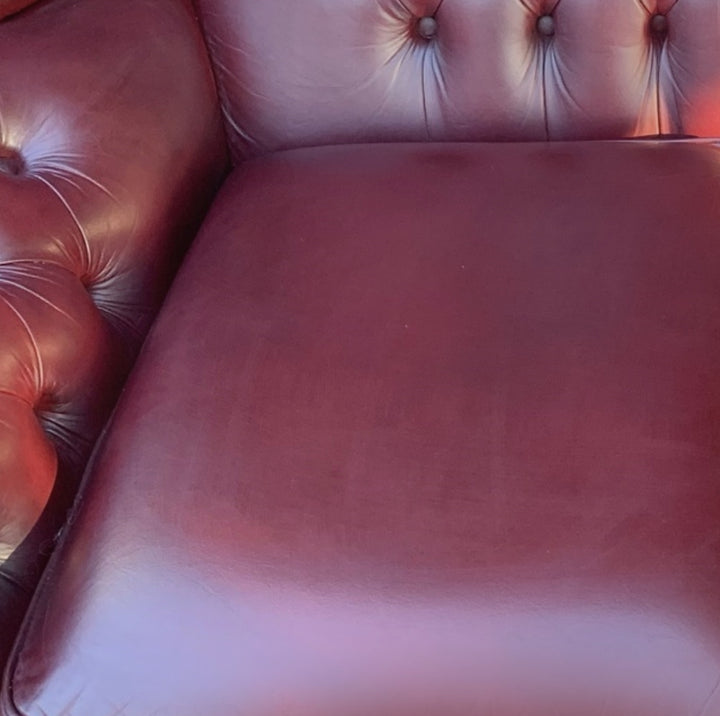
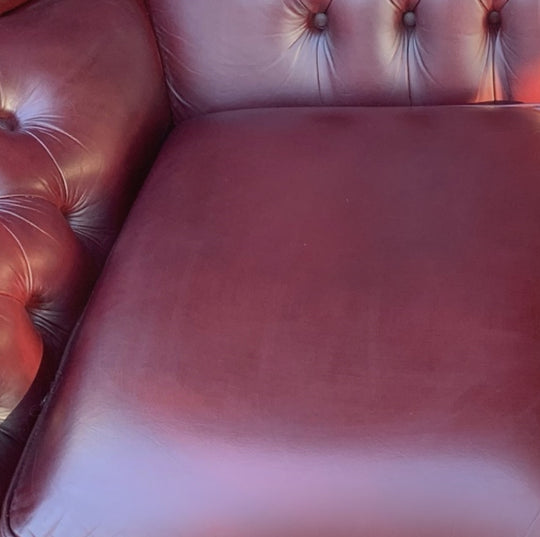
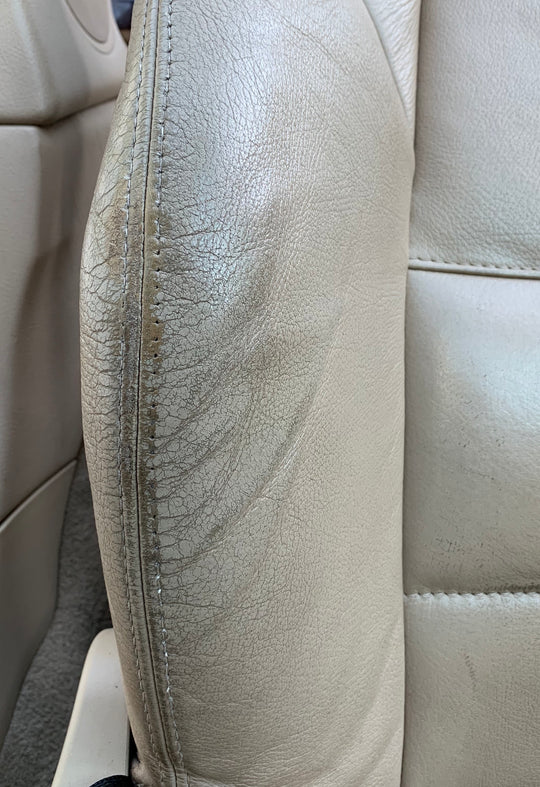
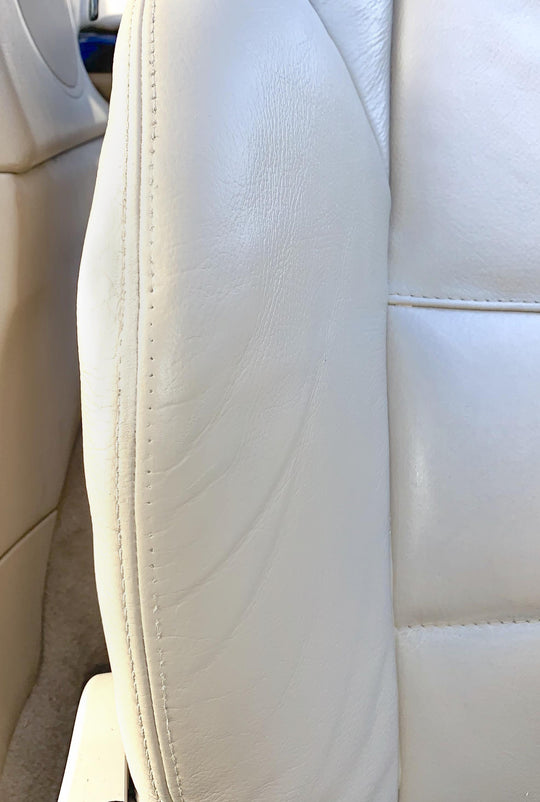
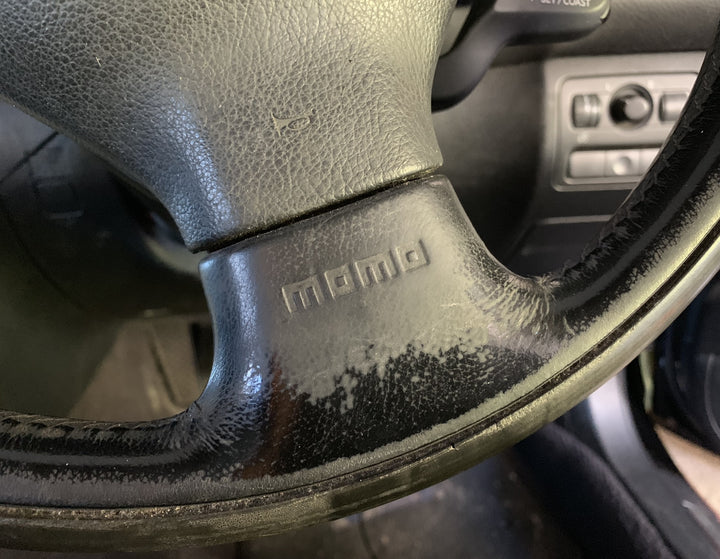
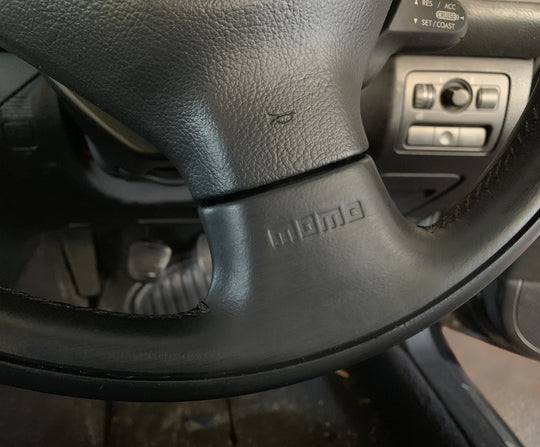
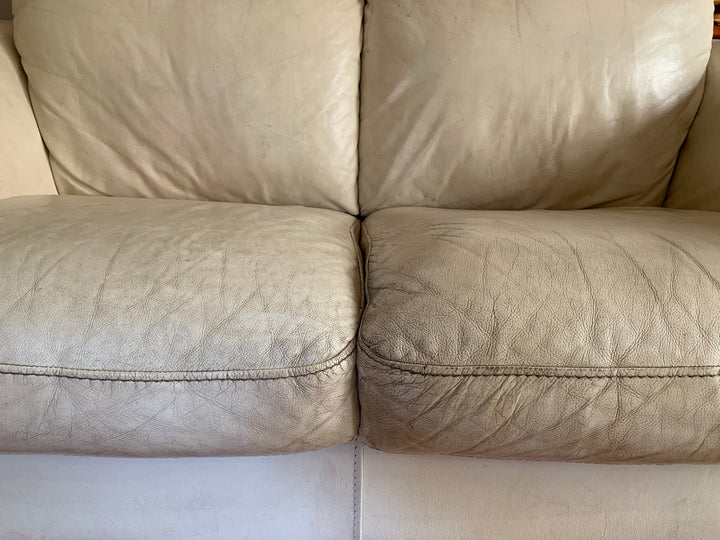
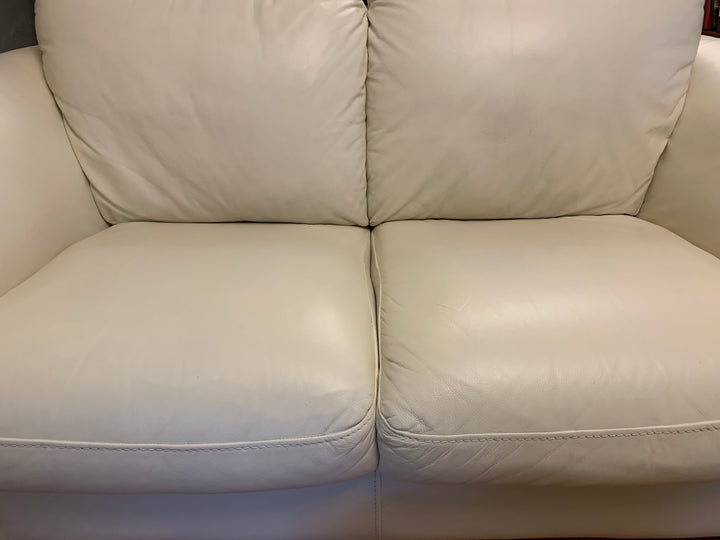
This best seller is the one you need if you want to cosmetically repair surface damage such as scratches, holes, pet damage, rips, scuffs, cracks, and general wear and tear. It's also the kit you need if you want to correct colour problems like stains and discolouration. Use the same colour or change it up with a new one. Apply by hand with a sponge or use a spray gun. No special experience needed.
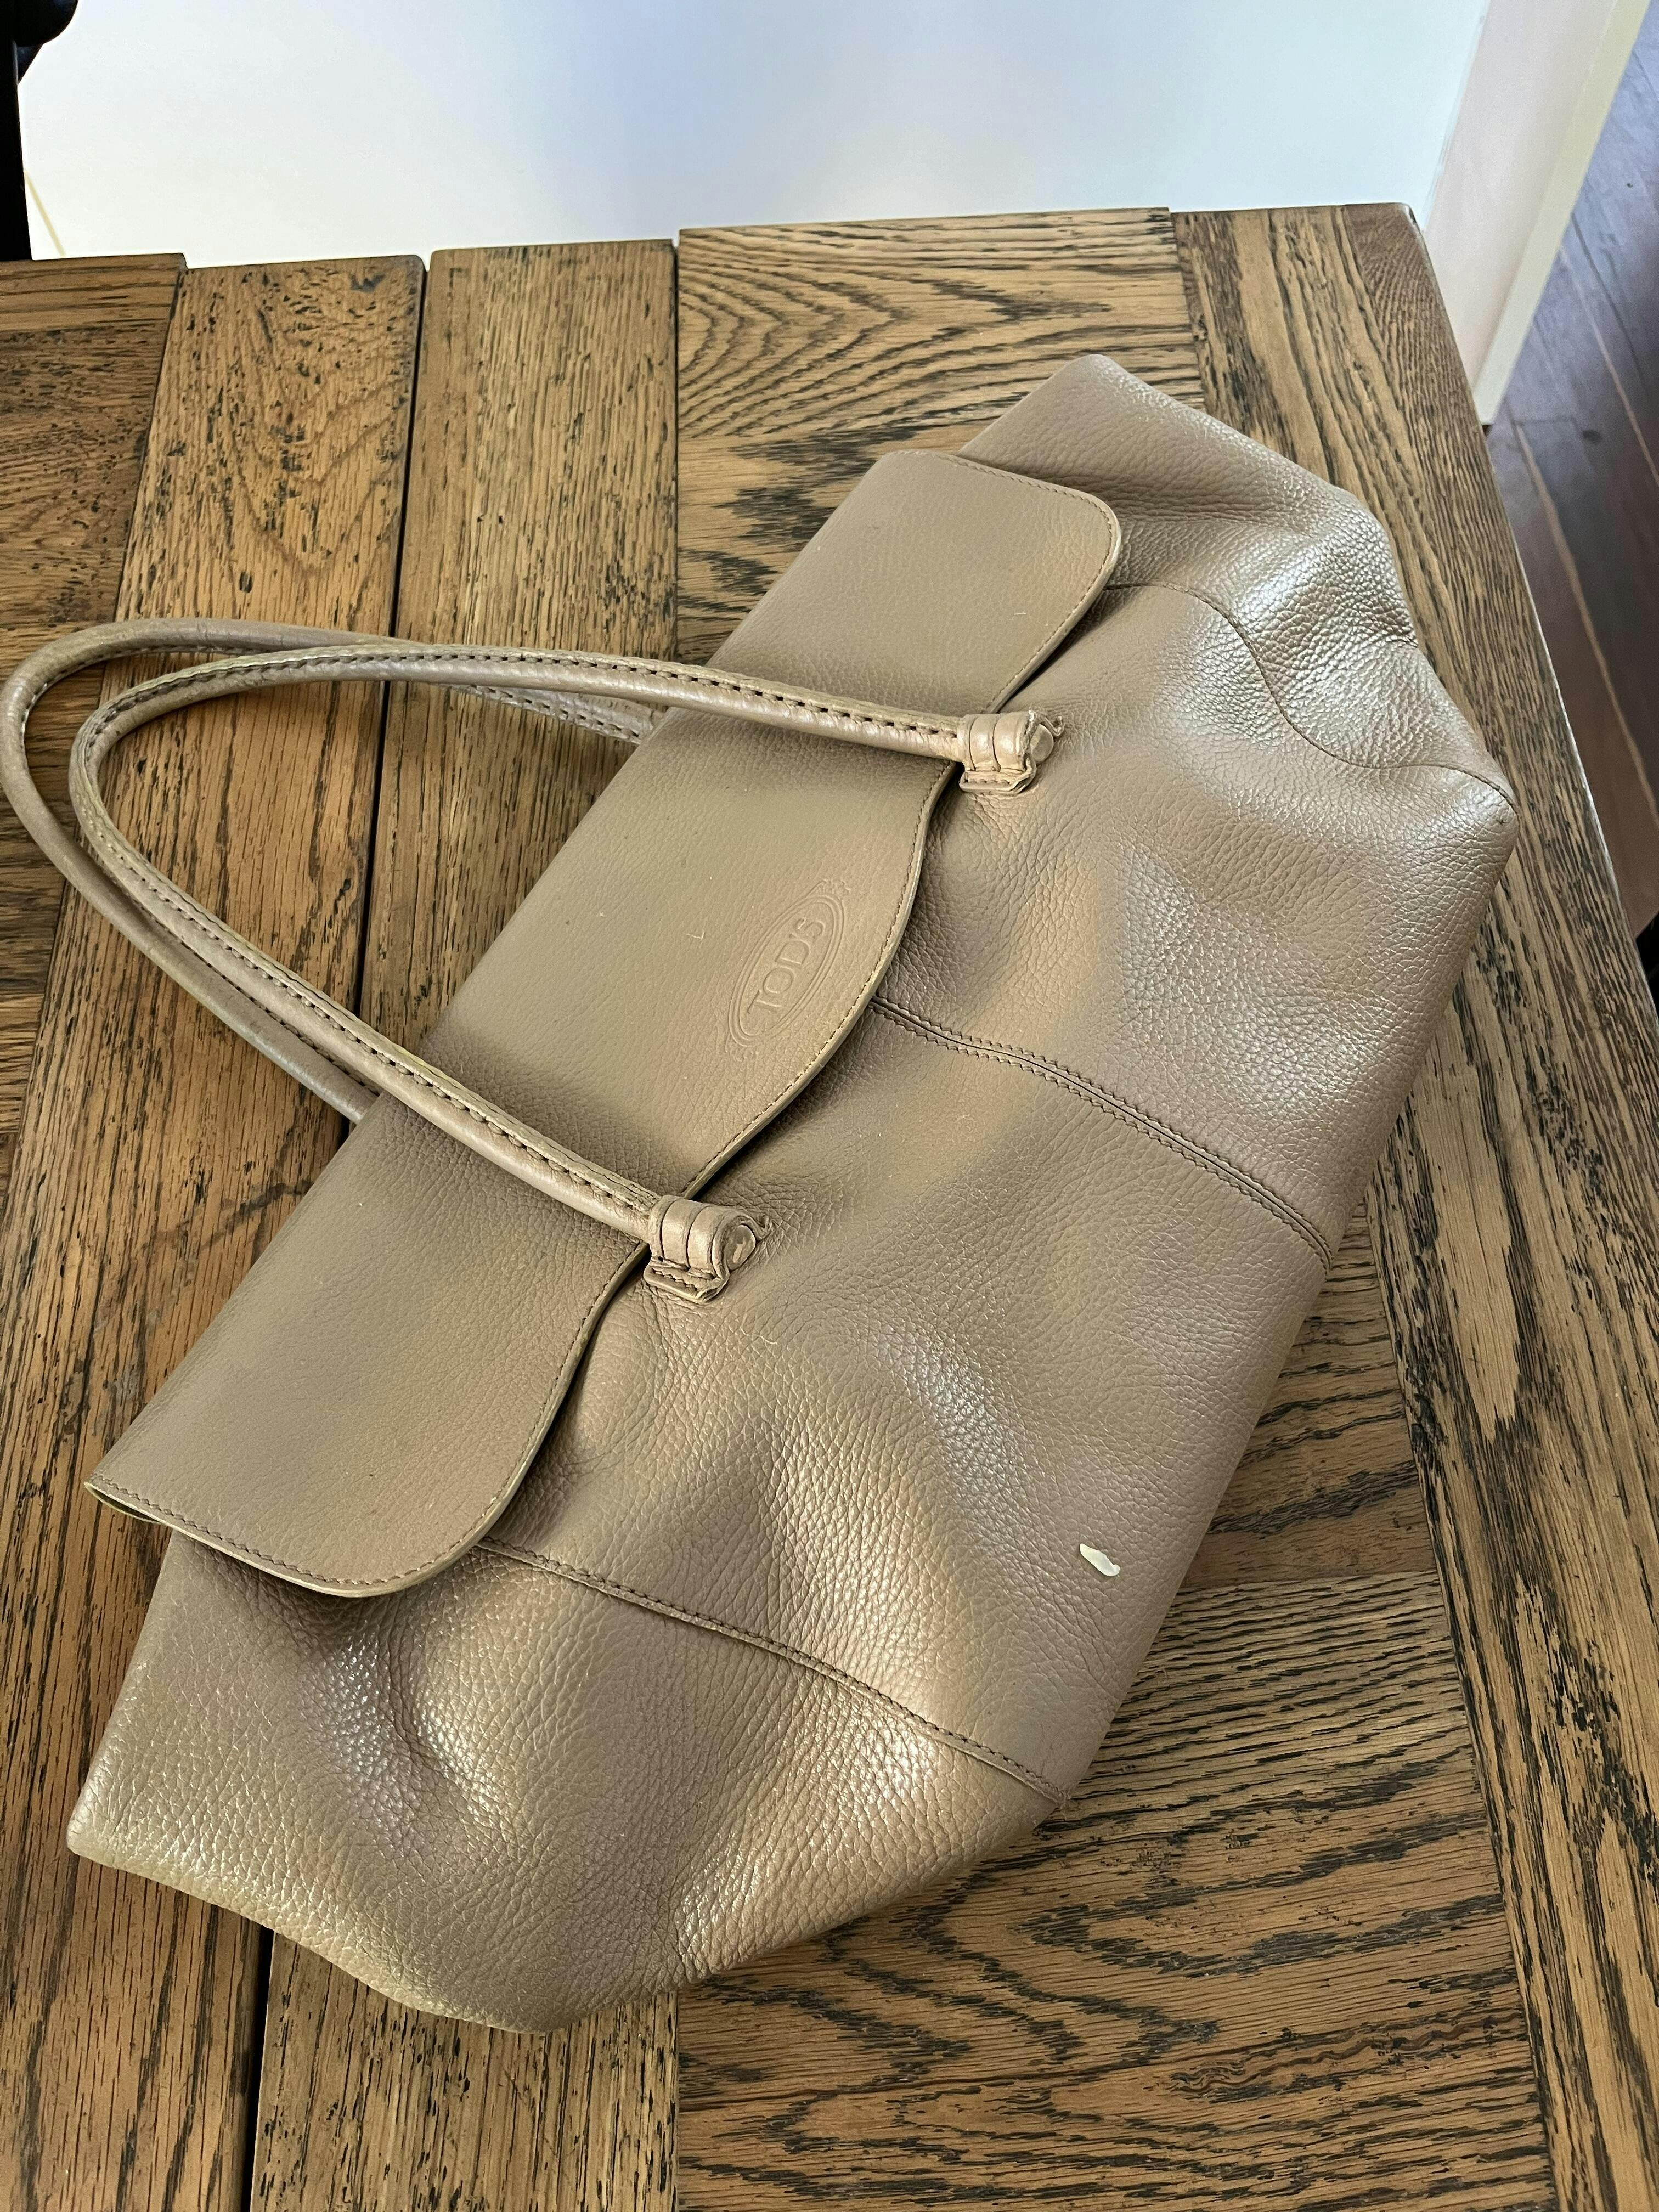
For sofas, cars, apparel, bags and lots of other leather
Calling all DIYers. You'll love the professional results you can achieve with this premium leather repair and recolour kit. From small touch-ups in your car to changing the colour of an occasional chair or recolouring an entire lounge suite, this kit enables showroom results.
A tannery grade system
Our refinishing system is the real deal. It echoes the process used on your pigmented leather in the tannery. No compromising shortcuts, it includes primer for maximum adhesion (a key durability factor), professional grade leather paint plus a separate bottle of performance tested clear topcoat. By using the same layering process as the original manufacturer, a beautiful, wear-resistant transformation is possible. It's flexible and self-sealing which means that it won't rub off onto your clothes.
Customise your kit
Customise your kit by selecting the size you need, the colour you like and the level of shine in your topcoat. You can also add glue and white leather filler (can be tinted with your leather paint) to your kit if your job has surface imperfections and cosmetic bingles that need to be repaired before doing the colour work. (Selected combinations).
Colour & sheen
The leather paint has a satin finish so it suits most cars and furnishings. You can make it flatter by adding Dulling Agent (No.30) or increase the shine by using Topcoat Gloss or High Gloss. Offering full coverage, it's possible to cover the old coatings with the same, similar or different colour.
Get ready to take a bow to the tune of applause from your family and friends.
Want to know more about the products? Read through the info on this page then head to the How To library to learn more about choosing your colour and topcoat and how to use the products.
Need accessories for your job? Here they are.
Want to see what other customers have done with this kit? Head to the Customer Before & After gallery.
Instructions: Print the Directions for Use, Tips and Details ![]()


Repair & Recolour
Enjoy incredible results when you repair surface imperfections and refinish your leather with this pro-grade kit. When accidents happend and times takes a toll, recoat you sofa, car interior, handbag, and much more.
With around 85 beautiful colours to choose from, you've found the largest range of tannery grade leather colourants in Australia.
5 steps to a showroom finish
Clean, Sand, Prime, Colour and Topcoat. No tools needed.
Replenish old, damaged coatings with fresh new ones. This process echoes the original tannery finish and the kit gives you the gear you need to keep your leather looking beautiful.
Suitable for pigmented (painted/coated) leathers, the products are safe, durable, and easy to touch-up as needed. Simply amazing results await!
“I am absolutely delighted with the result. Our 32 year old lounge looks loved again 😊I have just ordered the care pack to keep it looking good”
Debra, NSW
Customer Reviews
Number of steps but gives a great result.
I had a very old expensive designer bag which was quite worn but I still loved wearing it so am so happy I’ve record it. It was so easy to do and the results are perfect.
So simple and a great outcome!
Sorry guys I have not had change to apply the product yet. But will give upu an update when I have done the job.
Regards
Dennis
Leather Repair Kit took away all my awful cracks on my sofa’s armrest. I am very happy there is a product like this . Yes I would recommend this product and thank you to Leather Hero Australia.